
TL;DR
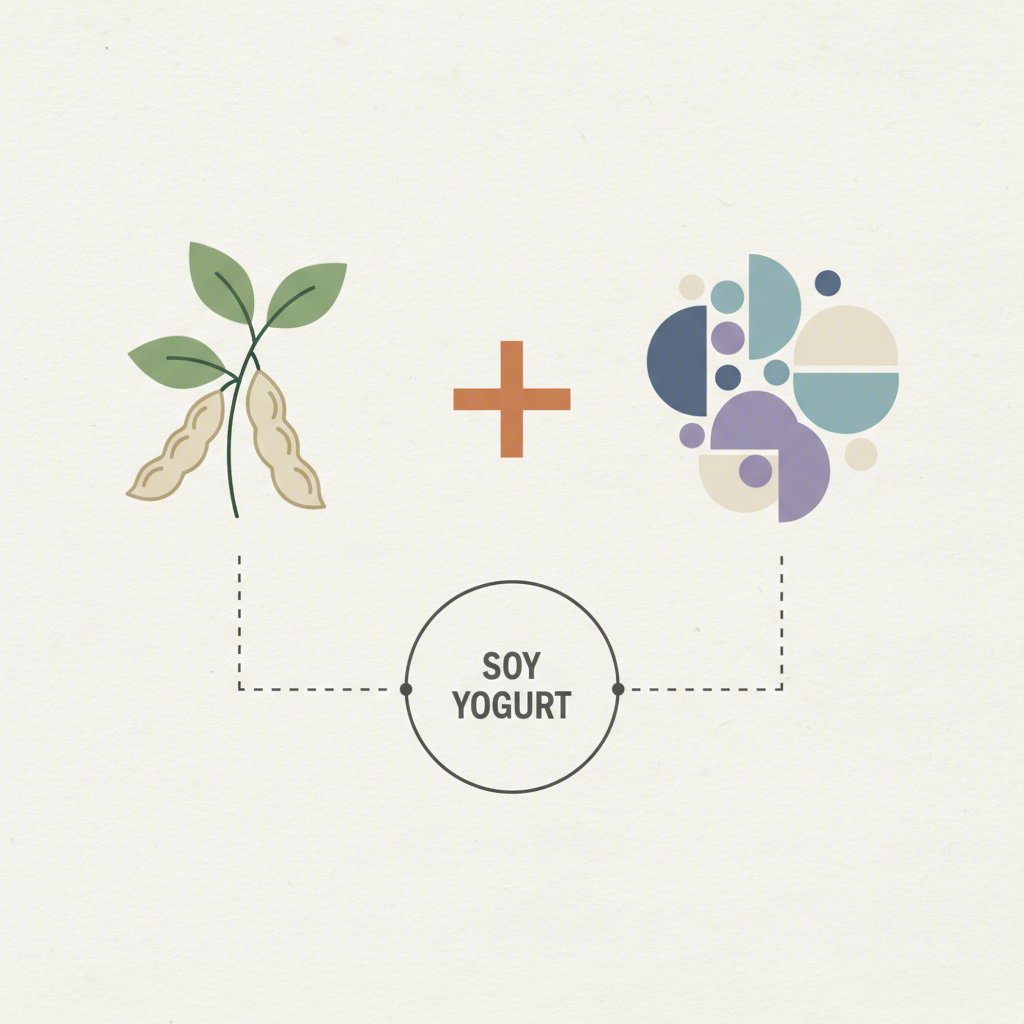
Making homemade soy yogurt is a straightforward process that requires just two essential ingredients. It involves combining unsweetened soy milk with a starter culture, like probiotic powder or a spoonful of existing live yogurt. The mixture is then incubated in a warm, stable environment—such as an Instant Pot or a yogurt maker—for 8 to 15 hours until it ferments and thickens into a creamy, tangy treat.
The Essential Ingredients for Perfect Soy Yogurt
Crafting delicious, creamy soy yogurt at home starts with selecting the right ingredients. While the list is short, the quality of each component is crucial for successful fermentation. You only need two core items: unsweetened soy milk and a starter culture. Understanding why each one matters will set you up for a perfect batch every time.
The most important ingredient is the soy milk. For the best results, you must use a plain, unsweetened soy milk that contains only two ingredients: soybeans and water. Brands like Westsoy, Edensoy, or the shelf-stable Trader Joe’s version are consistently recommended by home yogurt makers. Any additives, such as sugars, gums, thickeners, or flavorings, can interfere with the bacterial cultures and prevent the yogurt from setting properly. The high protein content in pure soy milk provides the necessary fuel for the bacteria to do their work and create a thick texture.
The second key ingredient is the starter culture, which introduces the live probiotic bacteria that transform the milk into yogurt. You have two main options here:
- Probiotic Capsules or Powder: This is the most reliable method, especially for your first batch. You can simply open a few vegan probiotic capsules and stir the powder directly into your cooled soy milk. This ensures you have a potent and active culture to kickstart the fermentation.
- Existing Live-Culture Yogurt: Once you have a successful batch, you can save a few tablespoons to use as the starter for your next one. This method is cost-effective and convenient. Many find that the yogurt’s flavor and texture improve over several generations as the culture adapts.
Choosing between these starters comes with its own considerations. Probiotic capsules offer consistency and are great for starting fresh, but you need to ensure they are viable and stored correctly. Using leftover yogurt is simpler and free, but the culture can weaken over time, requiring you to eventually start over with a fresh probiotic powder.
Step-by-Step Guide to Making Soy Yogurt
With your ingredients ready, you can begin the simple yet precise process of turning soy milk into yogurt. The journey involves a few key phases: preparing the milk, introducing the culture, and letting the magic of fermentation happen. Following these steps carefully will help you achieve a smooth, tangy, and delicious result.
First, it’s essential to prepare your equipment. To prevent unwanted bacteria from contaminating your batch, sterilize all your tools, including jars, lids, and any whisks or spoons you plan to use. You can do this by running them through a hot dishwasher cycle or by carefully rinsing them with boiling water.
Here is a detailed breakdown of the yogurt-making process:
- Heat the Soy Milk (Optional but Recommended): Pour your unsweetened soy milk into a clean pot. Gently heat it until it reaches between 185-195°F (85-90°C). This step isn’t always necessary if you’re using a fresh, factory-sealed carton, but it helps kill any competing microbes and can result in a thicker final product.
- Cool to the Perfect Temperature: This is the most critical step. Remove the milk from the heat and let it cool down to between 108-115°F (42-45°C). If the milk is too hot when you add the starter, it will kill the delicate live cultures. If it’s too cool, they won’t activate properly. A food thermometer is highly recommended for accuracy.
- Inoculate with Your Starter: Once the milk is at the correct temperature, it’s time to add your starter. If using probiotic capsules, open them and sprinkle the powder into the milk. If using yogurt from a previous batch, add a few tablespoons. Gently whisk until the starter is fully dissolved and incorporated. Avoid over-mixing, which can introduce too much air.
- Pour and Prepare for Incubation: Carefully pour the inoculated milk into your sterilized glass jars or directly into the liner of your Instant Pot.
To ensure success, keep these best practices in mind. Always use the freshest ingredients possible. If you enjoy making soy yogurt, you might also appreciate the control and freshness that comes from making your own plant-based milks. For those interested, Soy Milk Quick provides a thorough guide to the best plant milk makers, helping you choose a machine to create everything from soy to almond milk right in your kitchen.
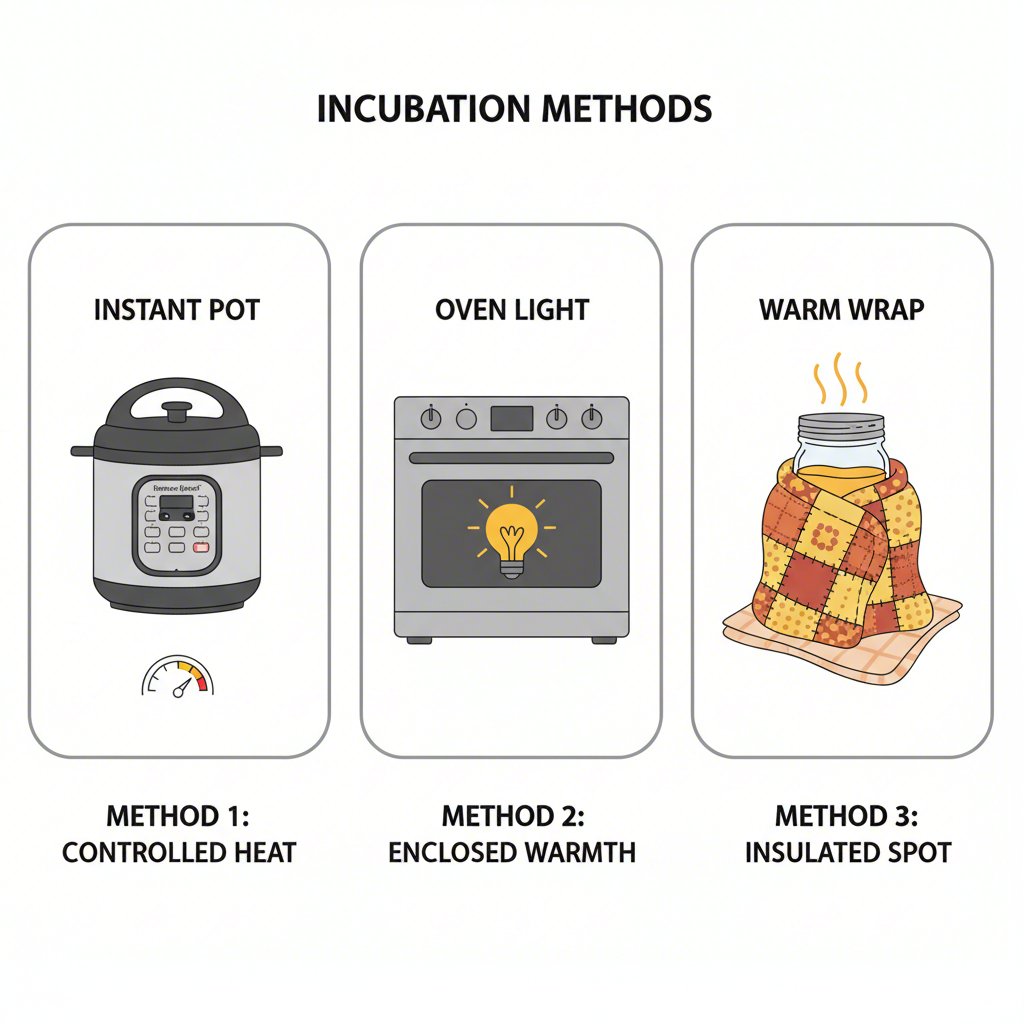
Choosing Your Incubation Method: Instant Pot, Yogurt Maker, and More
Incubation is the quiet, patient phase where the bacteria get to work, fermenting the soy milk and thickening it into yogurt. The key to this stage is providing a stable, warm environment for an extended period. While several methods work, some offer more convenience and consistency than others. The Instant Pot is a popular favorite, but you can achieve great results with other common kitchen setups too.
The most reliable and hands-off method is using an appliance with a dedicated yogurt setting. The Instant Pot is highly recommended because it maintains a precise and steady temperature for the entire duration, which is ideal for fermentation. Simply place your jars inside, secure the lid (set to vent, not seal), and use the ‘Yogurt’ function for 8-15 hours. A longer incubation time will produce a tangier yogurt.
If you don’t have an Instant Pot, a dedicated yogurt maker works on the same principle and is another excellent option. However, you can also succeed without any special equipment. The oven method is a classic technique: place your jars in the oven with the light turned on. The small amount of heat from the bulb is often enough to create a perfectly warm environment. Alternatively, you can preheat your oven to its lowest temperature for just a few minutes, turn it off completely, and then place the yogurt inside to incubate.
To help you decide which method is best for you, here is a comparison of the most common approaches:
| Method | Pros | Cons | Typical Time |
|---|---|---|---|
| Instant Pot | Set-and-forget convenience, highly consistent temperature control. | Requires a specific appliance. | 8-15 hours |
| Yogurt Maker | Designed specifically for this purpose, consistent results. | Another single-use appliance to store. | 8-12 hours |
| Oven with Light On | No special equipment needed, uses an existing appliance. | Temperature can be less consistent; ties up your oven. | 10-15 hours |
| Warm Spot/Blanket | Requires no electricity or special tools. | Only works in warm climates; least reliable temperature control. | 12-24 hours |
Regardless of the method you choose, the goal is the same: keep the yogurt undisturbed in a warm place (around 110°F or 43°C) until it has set. Once the time is up, the yogurt will have a soft, set consistency. The final step is to chill it in the refrigerator, which will help it firm up even more.
Troubleshooting and Tips for Thick, Creamy Results
Even with a simple recipe, your first few batches of homemade soy yogurt might not turn out perfectly. Don’t be discouraged! Most common issues, like runny yogurt or an off-taste, are easy to fix with a few adjustments. Understanding the potential pitfalls and how to address them will help you achieve that coveted thick, creamy texture every time.
The most common problem is yogurt that doesn’t set and remains thin or watery. This is almost always due to one of three things: the wrong soy milk, incorrect temperature, or an inactive starter. Double-check that your soy milk contains only soybeans and water. Ensure you cooled the milk to the 108-115°F (42-45°C) range before adding your starter. Finally, make sure your probiotics are not expired or that your starter from a previous batch is still active and hasn’t been contaminated.
If your yogurt sets but isn’t as thick as you’d like, there are a few simple solutions. First, after incubation, you might see a layer of clear or yellowish liquid (whey) on top. Carefully spoon this off before stirring or refrigerating the yogurt. Second, chilling is essential; the yogurt will firm up considerably after several hours in the refrigerator. For an even thicker, Greek-style consistency, you can strain the finished yogurt through a cheesecloth-lined colander for a few hours to remove more whey.
Here are some common troubleshooting questions and answers:
- Why is my yogurt grainy or lumpy? This can happen if the milk was heated too quickly or if the starter wasn’t mixed in smoothly. Gentle heating and whisking are key.
- Why does my yogurt taste bland? For a tangier flavor, simply increase the incubation time. Let it ferment for 12-15 hours instead of 8.
- Why did my yogurt separate into curds and whey? This usually means it was incubated for too long or at too high a temperature. Try reducing the time or checking your appliance’s temperature.
- How should I store my yogurt? Store your finished soy yogurt in an airtight container in the refrigerator. It will typically last for 5-7 days. Always use a clean spoon to serve it to prevent introducing new bacteria.
Remember that making yogurt is a science, but it’s also an art. Your first batch is a learning experience. With each subsequent batch made from your own starter, the culture will mature, and you’ll find the texture and flavor becoming even better.
Your Path to Perfect Homemade Yogurt
Making your own soy yogurt is a rewarding kitchen project that puts you in complete control of the ingredients and the final taste. By starting with pure, unsweetened soy milk and a quality starter, you can create a fresh, healthy, and delicious plant-based staple. The process relies on careful temperature control and patience during incubation, but with tools like an Instant Pot or even just your oven, consistently great results are well within reach. Don’t hesitate to experiment with incubation times to find the perfect level of tang for your palate. Enjoy the satisfaction of a truly homemade, creamy delight.
Frequently Asked Questions
1. Can you make soy yogurt at home?
Yes, absolutely. Making soy yogurt at home is a simple process that involves heating and cooling unsweetened soy milk to a specific temperature, mixing in a probiotic starter culture, and allowing it to incubate in a warm place for several hours until it thickens.
2. Do you need to boil soy milk before making yogurt?
While not always strictly necessary if using a fresh, sealed carton of soy milk, boiling or heating the milk to around 185°F (85°C) is highly recommended. This step helps to sterilize the milk by killing any competing bacteria and also denatures the proteins, which can lead to a thicker, creamier final product. After heating, it is crucial to cool it back down before adding the starter.
3. Is soybean yogurt healthy?
Soy yogurt is a healthy food choice, particularly for those following a plant-based diet. It is a good source of high-quality protein, providing all essential amino acids. It is also often fortified with vitamins and minerals like calcium and vitamin B12. The live probiotic cultures in yogurt are also beneficial for gut health and digestion.
4. Is soy yogurt better than Greek yogurt?
Whether soy yogurt is “better” than Greek yogurt depends on your dietary needs and preferences. Soy yogurt is plant-based, dairy-free, and typically has more fiber and less sugar than dairy yogurts. On the other hand, traditional Greek yogurt usually contains more protein and calcium. Both can be part of a balanced diet.