TL;DR
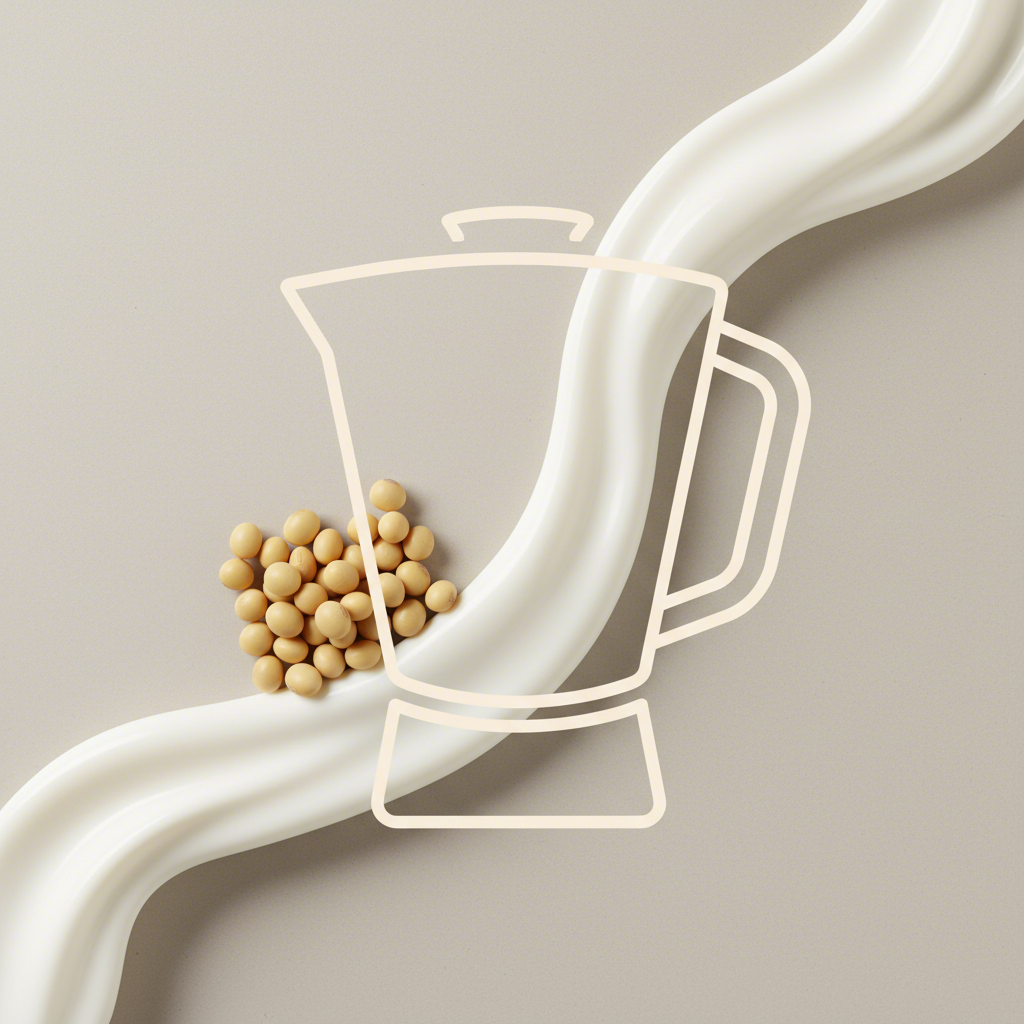
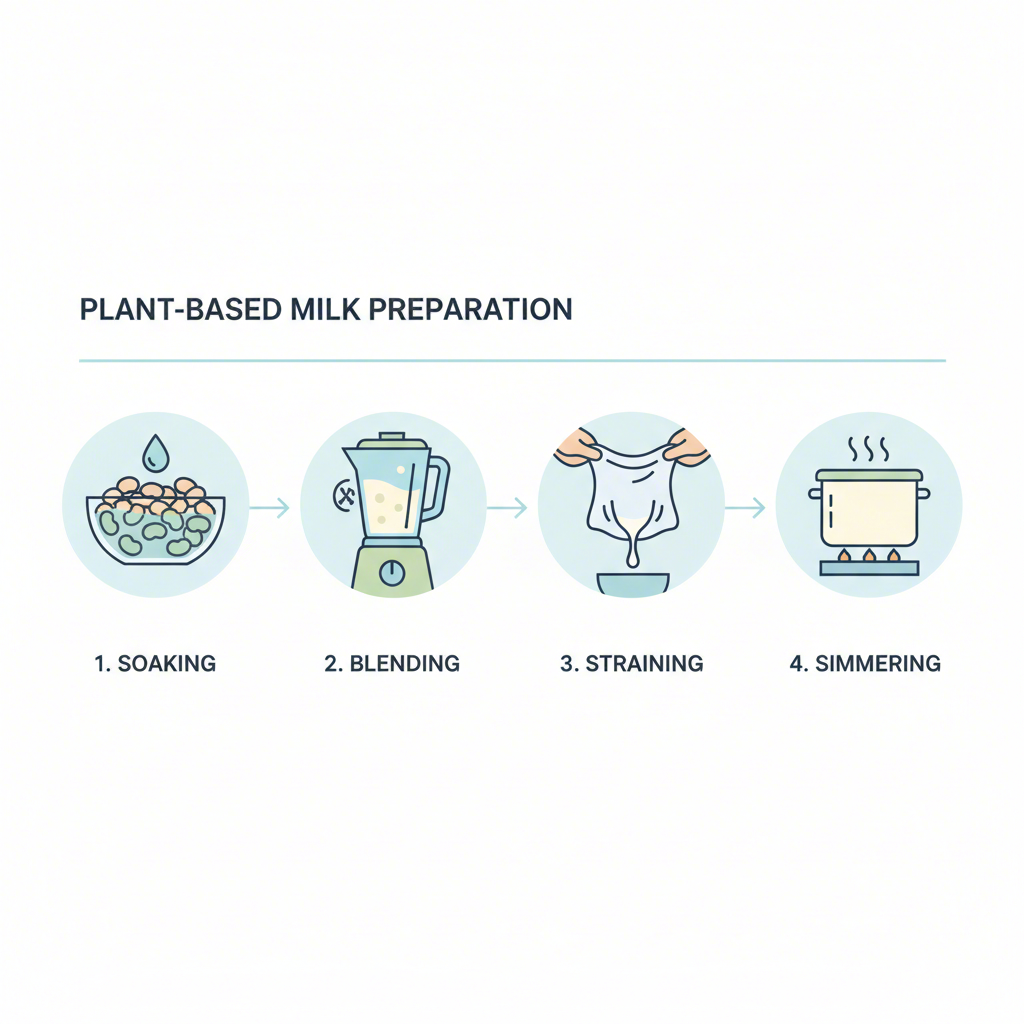
Making soy milk in a blender at home is a straightforward and rewarding process. It involves four key stages: soaking dried soybeans overnight to soften them, blending the beans with fresh water until completely smooth, straining the mixture through a nut milk bag to separate the liquid, and finally, simmering the raw milk for at least 10-20 minutes. This last cooking step is essential for both safety and flavor, transforming the raw liquid into delicious, creamy soy milk.
Essential Equipment and Ingredients
Before you begin, gathering a few simple items will ensure the process goes smoothly. The beauty of homemade soy milk lies in its simplicity, requiring just two primary ingredients and some basic kitchen tools. You have complete control over the quality, which makes a significant difference in the final taste and texture.
For the best-tasting soy milk, start with high-quality ingredients. The flavor of your beans and water will directly impact the final product, so choosing wisely is the first step toward a delicious outcome. Here’s exactly what you’ll need:
Ingredients:
- Dried Soybeans: Look for organic, non-GMO yellow soybeans if possible. As noted by several home cooks, including those at Sift & Simmer, good quality beans that are pale yellow, round, and smooth will yield a creamier, better-tasting milk. You can find them in Asian supermarkets, health food stores, or the bulk section of larger grocery stores.
- Water: You will need water for both soaking and blending. Since water is the main component besides the beans, using filtered or good-tasting tap water is recommended to avoid any unwanted flavors.
- Optional Sweeteners and Flavorings: To tailor the milk to your taste, you can add a sweetener like rock sugar, maple syrup, or dates. A pinch of salt or a splash of vanilla extract can also enhance the flavor significantly.
Equipment:
- Blender: A high-powered blender is ideal for pulverizing the soybeans into a very fine, smooth puree, which helps extract the maximum amount of milk. However, a standard blender can also work; you may just need to blend for a bit longer.
- A Large Pot: You’ll need a pot with ample extra space to cook the soy milk. The milk has a tendency to foam up and boil over very quickly, so using a pot that is only about one-third full is a wise precaution.
- Straining Cloth: A nut milk bag is the most effective tool for this job. Alternatively, you can use a few layers of cheesecloth or a jelly bag to strain the pulp from the milk effectively.
While a powerful blender is perfect for this recipe, those who make plant-based milks regularly might consider a dedicated appliance. For instance, Soy Milk Quick offers a comprehensive guide to the best plant milk makers, comparing models for different needs and budgets. These machines often combine the blending, heating, and sometimes even straining steps into one automated process.
The Step-by-Step Blending Process
With your ingredients and equipment ready, you’re prepared to turn simple soybeans into fresh, creamy milk. This process is methodical but not difficult. Following these steps carefully, especially the final cooking stage, is crucial for a successful and delicious batch. Each step plays a vital role in the milk’s final texture and taste.
Here is the detailed, four-step guide to making soy milk in a blender:
- Soak the Soybeans: Start by rinsing your dried soybeans and picking out any discolored or broken ones. Place them in a large bowl and cover them with at least three times their volume in water. Let them soak for 8 to 12 hours, or simply leave them overnight in the fridge. During this time, they will more than double in size. Once soaked, drain the water and give the beans another good rinse. For an even milder flavor, you can gently rub the beans between your hands to loosen the skins and rinse them away, though this step is optional as described in a detailed guide by Mary’s Test Kitchen.
- Blend the Beans and Water: Transfer the soaked and rinsed soybeans to your blender. Add fresh, clean water. A good starting ratio is approximately 1 cup of dried soybeans (which will have expanded) to 4-5 cups of water. Blend on high speed for 1 to 2 minutes, or until the mixture is completely smooth and pulverized with no large bean pieces remaining. The resulting liquid will look like a thick, creamy puree.
- Strain the Milk: Place your nut milk bag or cheesecloth-lined strainer over a large pot. Pour the blended soybean puree into the bag. Secure the top and begin to squeeze the liquid into the pot. Be patient and thorough, wringing the bag until the pulp inside, known as okara, is as dry as possible. This okara is edible and high in fiber; don’t throw it away! It can be used in other recipes like veggie patties or baked goods.
- Cook the Raw Soy Milk: This is the most important step for safety and flavor. Pour the strained, raw soy milk into your large pot and place it over medium heat. Stir frequently with a spatula, scraping the bottom to prevent a skin from forming and burning. Bring the milk to a gentle boil, but watch it closely—it can foam up and boil over in an instant. Once it boils, reduce the heat to low and let it simmer for at least 10 to 20 minutes. According to a recipe from Lion Brand, this simmering process cooks the beans, removes the raw beany flavor, and makes the milk safe to consume. Skim off any foam that forms on the surface during cooking.
After simmering, your homemade soy milk is ready. You can enjoy it warm or let it cool completely before storing it in an airtight container in the refrigerator.
Tips for Richer, Tastier Homemade Soy Milk
One of the biggest differences between homemade and store-bought soy milk is the taste. Commercial versions often contain stabilizers, sweeteners, and flavorings that create a familiar, consistent product. Your homemade version will taste purer and more bean-forward, but with a few simple adjustments, you can elevate its flavor and texture to be truly exceptional. These tips address common issues and help you customize each batch to your liking.
The goal is to reduce the sometimes-strong ‘beany’ flavor and enhance the creamy, nutty notes of the soybeans. Experiment with these additions and techniques to find your perfect recipe.
Enhancing Flavor and Sweetness
The easiest way to improve the taste is by adding flavorings after the milk is cooked. Wait until the simmering is done, then stir in your preferred additions while the milk is still warm. Consider these options:
- Sweeteners: A small amount of sweetener can balance the flavor beautifully. Try adding a teaspoon or two of maple syrup, a few tablespoons of granulated sugar, or some traditional rock sugar, which provides a milder sweetness. For a natural option, you can even blend a few pitted dates with the soybeans.
- Vanilla and Salt: A splash of vanilla extract adds a warm, familiar aroma and taste that complements the soy. Additionally, a tiny pinch of salt doesn’t make the milk salty but actually enhances its natural sweetness and overall flavor profile.
- Other Flavors: Get creative by adding other ingredients. A tablespoon of cocoa powder can turn it into chocolate soy milk, while a little black sesame powder can create a rich, nutty drink popular in Asian cuisine.
Improving Texture and Reducing ‘Beany’ Taste
The ‘beany’ taste comes from an enzyme in soybeans called lipoxygenase. The right preparation and cooking methods can significantly minimize its effect.
- Peel the Beans: As mentioned earlier, taking the extra time to remove the skins from the soybeans after they are soaked can result in a smoother, less beany-tasting milk.
- Don’t Skip the Simmer: Simmering the milk for a full 20 minutes is crucial. This not only ensures it’s safe to drink but also helps cook off the raw, grassy flavors, resulting in a cleaner taste.
- Adjust the Water Ratio: For a richer, creamier milk that’s more like whole milk, simply reduce the amount of water you use for blending. Start with 3-4 cups of water per 1 cup of dried beans and adjust from there to find your ideal consistency.
Frequently Asked Questions
1. Can you blend soy milk?
Yes, absolutely. Blending is the central step in the process of making soy milk from scratch. After soybeans have been soaked to soften them, they are pureed in a blender with water. This action breaks down the beans and releases their proteins and fats into the water, creating a thick slurry that is then strained to become raw soy milk.
2. How to make soy milk at home easy?
The easiest method involves four simple, straightforward steps. First, soak dried soybeans in water overnight. Second, drain and rinse the beans, then blend them with fresh water until they form a smooth puree. Third, strain this puree through a nut milk bag or cheesecloth to separate the liquid milk from the pulp. Finally, and most importantly, gently simmer the strained milk on the stove for 15-20 minutes to cook it thoroughly before drinking.